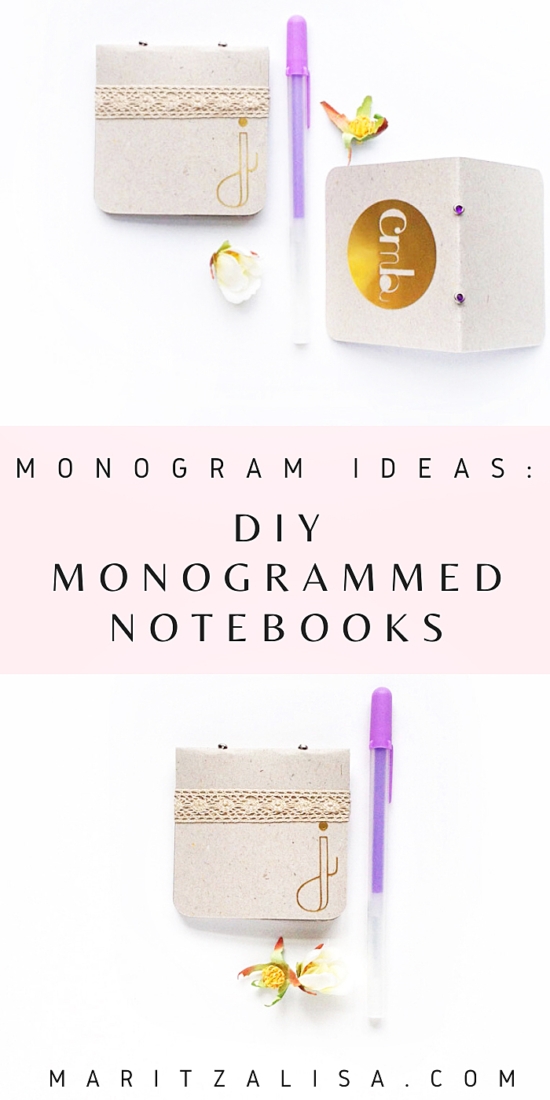
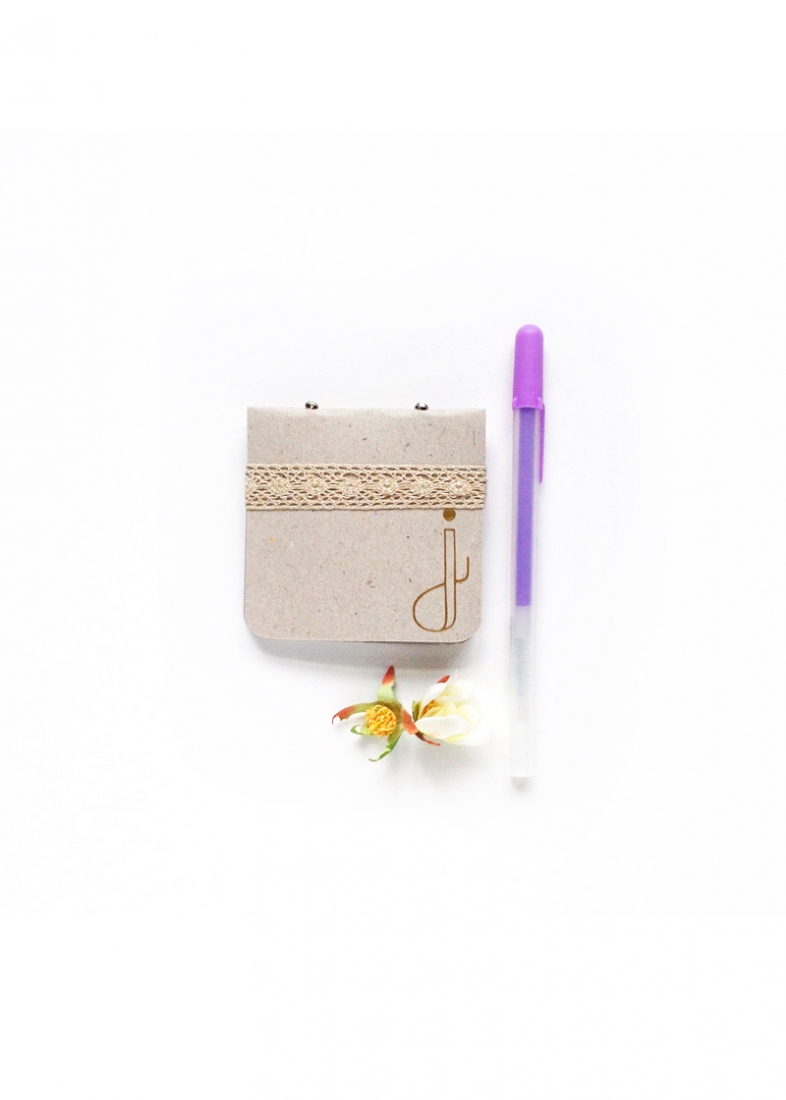
Hello Friends! It’s Spring Break here in our neck of the woods. Lots of wind and warmth which means outside time (with my hair up, cuz it’s madness otherwise). But before I jet off with Big and Small to the park let me show you how to make these cute mini monogrammed notebooks. Perfect for Mother’s Day and Teacher Appreciation Week/Month/Year (my Mama is a retired teacher, so I’m BIG into Teacher Appreciation). This tutorial involves the Silhouette Cameo, but you can also do this by hand with the right tools. For the pages of the book, I used graph paper, and for the book covers I used chipboard and gold foil sticker paper.
The What
- Silhouette cutting machine
- Silhouette Studio
- Blade
- Cutting Mat
- Graph Paper
- Chipboard
- Gold Foil
- Brads
- Mini scoring board
- Stylus (optional)
The How
Step 1: For the inner pages, create rounded rectangles (3″x6″) with 2 small circles in the middle. The holes should be big enough for your brads to fit (or string if you do not plan to use brads)
Step 2: Cut your inner pages using the graph paper. My graph paper is very thin – the settings I used are on the right side of the image below
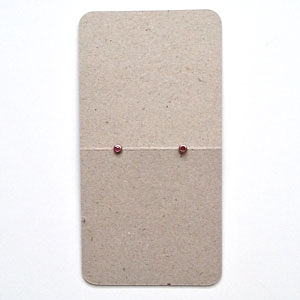
Step 3: Create a slightly bigger version of your page for the cover of your book. Add the holes (same size, same location), and cut your shapes using chipboard
Step 4: Score along the halfway points of your cover; fold your pages in half
Step 5: Assemble with cover, brads and pages

With monogrammed stickers for the front covers using gold foil (I used the free font – peach sundress), these little notebooks will be a hit.

Until the next one!
5 Comments on DIY Mini Monogrammed Notebooks
Comments are closed.
I’m eating this up! I’m so glad I found you. Maybe you’ll help me get past my feelings of intimidation of my Silhouette. : )
Yay! So happy you’re enjoying the projects. Have fun and let me know how your own projects turn out!
The diy mini notebooks are so cute!Thanks for sharing the steps.
Thanks!