
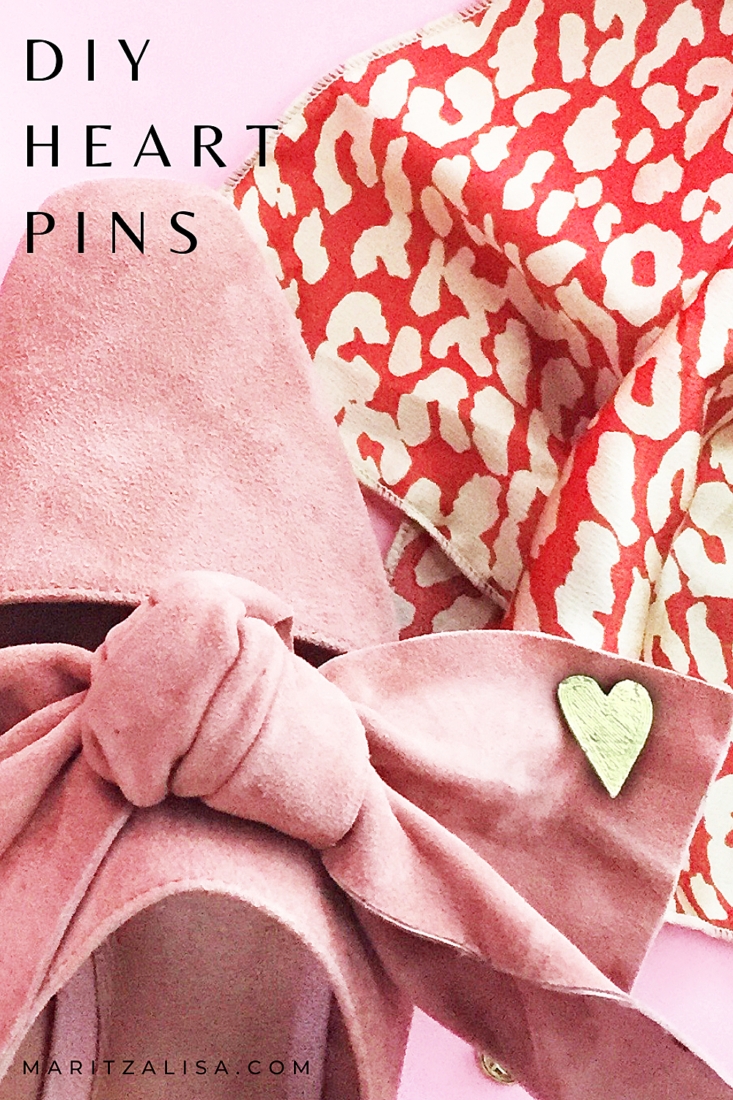
Happy Friday! We’re officially halfway through the school year and I feel like my mind is still in September. I can’t believe that Valentine’s Day is only a few weeks away. I made these cute DIY Flair – Gold Heart Pins to dress up my accessories for V-day. What do you think? They also make perfect gifts. What’s even better is that they can be used throughout the year and not just Valentine’s. Read on for the full tutorial!
What You Need – DIY Flair – Gold Heart Pins
- Silhouette Studio (there is a free version!)
- Silhouette Alta 3D printer
- White filament (comes with the 3D Printer)
- Platform (comes with the 3D Printer)
- Platform tape (comes with the 3D Printer)
- Silhouette 3D Software (comes with the 3D Printer)
- Flair pin blanks (I got mine on Etsy)
- Strong glue
- Temporary gold tattoo paper (there’s a 30% sale until Jan 31!)
- Wet towel
- Clear sealant (optional)
*This post contains affiliate links for products that I use and love!
Instructions – DIY Flair – Gold Heart Pins
If this is your first 3D project, I did a post on setting up your 3D Printer and making your first project.
- In Silhouette Studio, create your heart design using the pencil tool.You can also use a heart that you’ve used before for a previous project
- Save your design
- In the Silhouette 3D Software, open your design from step 2
- A pop-up will appear: Import As
- Select Extrusion
- The design will appear in 3D
- Select your heart design and make any adjustments to the dimensions on the top menu bar to ensure that the 3D version will be the desired size for the glue pad on your pin
- Select the 3D Print Tab on the top right
- Select the Quality (I used the Standard option)
- Press Print. The machine will heat up and print your 3D design – you will see the countdown of time as well
- Once your heart is printed, let it cool then remove the platform from the printer
- Use the spatula to gently remove your ornament and any extra filament
- Repeat for as many hearts you need
- Glue each heart to the glue pad on the pin
Tip: If the heart is not completely smooth or has little strings of filament attached to it, cut off the excess filament and use an emory board (nail file) or sand paper to smooth the surface and edges.
Now for the tattoo portion:
- Use your heart design and adjust the size to the same as your 3D version
- Mirror your design so that the image is reversed
- Load your gold tattoo sheet into your Silhouette cutting machine (metallic color side up)
- Send your design to cut using Temporary Tattoo Paper settings (I lowered my speed to 1 given the size)
- Once cut, remove the clear adhesive paper and apply the tattoo face down onto your heart pin
- Optional: apply a clear sealant to protect the tattooed image (this will help make the tattoo last longer)

Cute, right? All you need to do now is pin your flair to your favorite accessories or wrap them as a gift. Let me know how they turned out!


Looking for some more crafty inspiration? Check out my other tattoo paper projects and craft a little longer with me!