Many moons ago I owned a very wee jewelry business, so today I will take a short break from all things paper, and share with you an easy DIY earring project. These are perfect for any upcoming celebrations (ahem, Carnival and St Patrick’s Day are fast approaching!)
The beauty of this DIY is that you can easily change up the charms when you get tired of the current ones – fun, right? Okay, let’s get started.
[row] [span columns=”5″] [/span] [span columns=”7″]
The What
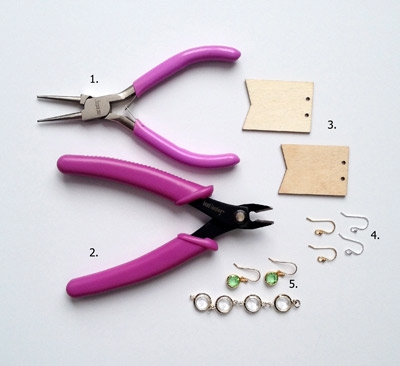
1. Jewelry-Making Round-Nose Pliers
3. Wood Embellishments (I got these at Michaels). These are optional but great for presenting your sassy creations as gifts
4. Earwires
[/span] [/row][row] [span columns=”5″] [/span] [span columns=”7″]
The How
Step 1:
Prep your charms. If your charm only has one connector, you can skip this step. For those with multiple connectors, cut all but one connector on your charm using your wire cutter. If the surface is rough after the cut, you will need to file it until smooth using a filing tool
[/span] [/row]
[row] [span columns=”5″] [/span] [span columns=”7″]
Step 2:
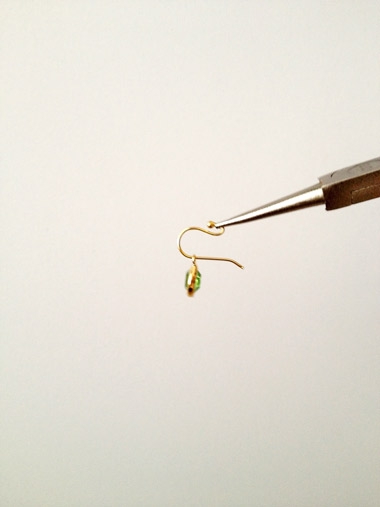
Use your fingers/pliers to create a slight opening between the ball of the earwire and the rest of the earwire
[/span] [/row]
[row] [span columns=”5″] [/span] [span columns=”7″]
Step 3:
Slide your charm along the earwire as shown, then close the opening you created to secure the charm
[/span] [/row][row] [span columns=”5″] [/span] [span columns=”7″]
Yay!
If you are giving your lovely creation as a gift, use the wooden tag as shown, and wrap ’em up. Otherwise, put them on your sassy self and sashay for the world to admire.
Until next time!
[/span] [/row]
2 Comments on DIY Earrings
Comments are closed.


Thank you very much 🙂 I also love the wooden tag! You gave me some inspiration for displaying earrings in my art shop in Cyprus !
Thanks, Christiana!