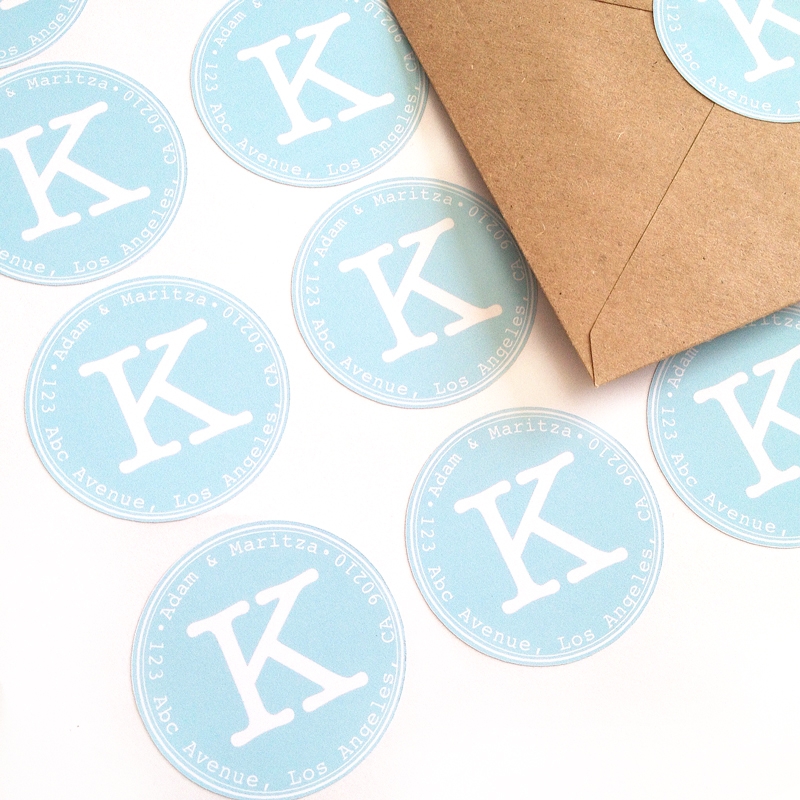
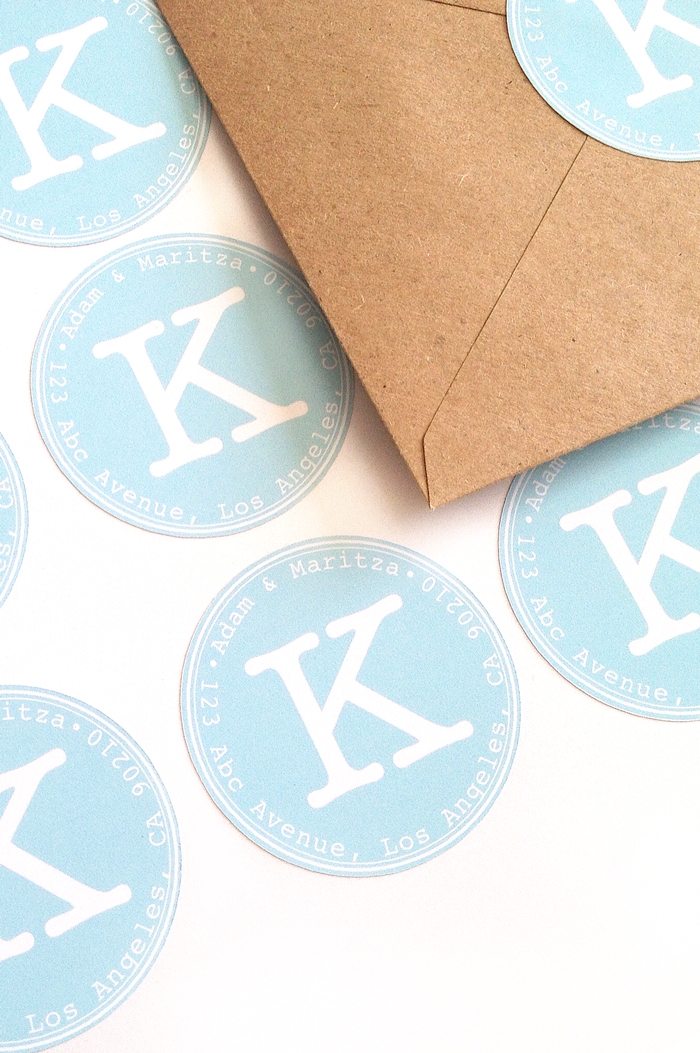
Hello! Today I am creating address labels with my Silhouette Cutting Machine. I’ve had mine for a year now, and if you love paper crafts and don’t have one, this is the machine (read: toy) for you. The thing is, it not only cuts paper, you can cut vinyl, cotton canvas, chipboard, stamping material – check it out at Silhouette America. It’s basically a machine that connects to your computer like a printer. Instead of printing, it cuts the images and shapes you design or purchase from the Silhouette Online Store. The Silhouette Blog and YouTube Channel are great starting points and sources of inspiration.
One of the many great features of the Silhouette is its ability to print and cut. Today’s DIY Address Labels with the Silhouette CAMEO project will be an example of this feature. You can download the Silhouette Studio basic edition for free – this is the software that works with the machine. I purchased the designer edition because it gives me more flexibility to create my own designs.
What You Need – DIY Address Labels with the Silhouette CAMEO
- Silhouette cutting machine
- Silhouette Studio
- White Printable Sticker Paper – any brand will do
- Color Printer
*This post contains affiliate links for products that I use and love!
How to make
DIY Address Labels with the Silhouette CAMEO
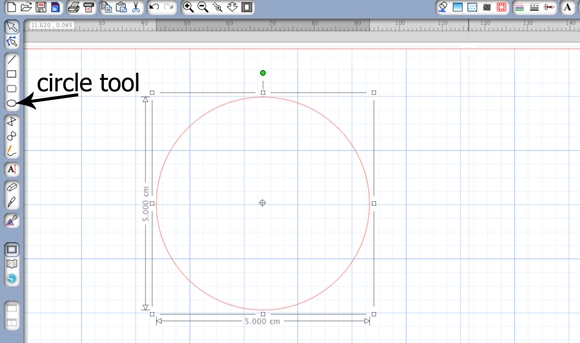
Step 1:
- Open up your Silhouette Studio and create a new file
- Set your page layout to 8.5×11
- Create a circle that is 2″ (5cm) wide
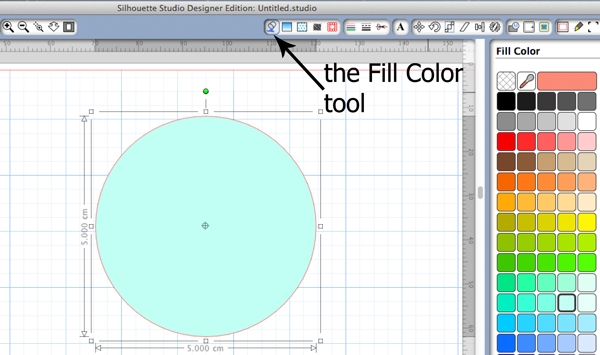
Step 2:
With the Fill Color tool, select your label’s background color (make sure your circle is selected before picking your color)
Step 3:
With your circle selected, create 3 inner circles with the Offset Tool

Step 4:
Thicken the middle 2 lines using the Line Style tool (Object > Style> Line Style)

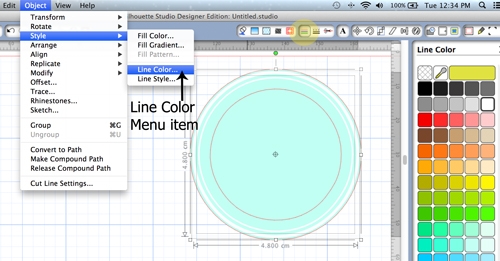
Step 5:
- Change the color of the middle 2 lines using the Line Color tool
- Now select the 3 outer circles and group them (Object >Group) so that they are now considered one unit (group). If your inner circle disappears, do not worry – just right click your new group and select Send To Back
Step 6:
- The inner most circle will be used as a guide for your name and address
- Select the text tool and create 2 text objects – one for your name(s) and the other for the address or message
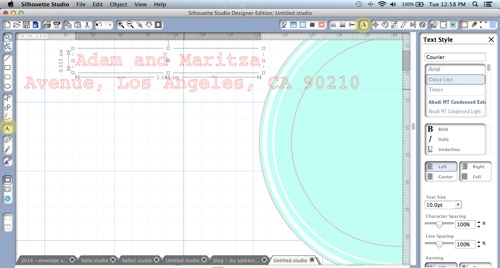
Step 7:
- Select the 2 text objects and change the color using the Fill Color tool
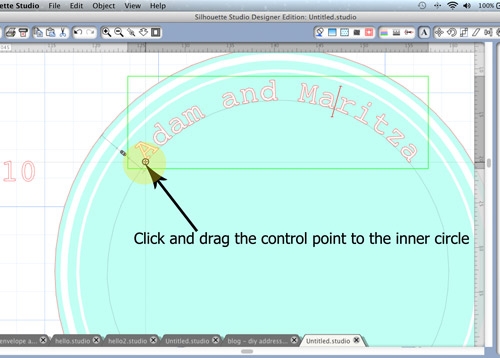
- Double-click the text object with your name(s). A green box will appear with a control point at the bottom left. Click on it and drag the text to the inner circle
- Repeat the same process for the address text
- Select all your circles and text to center align (Object>Align>Align Center-Middle), and group (Object>Group)
Step 8:
- Now add 2 small circles to either side of your name in the same color as the text, then group everything. You can use any object or image. It is just used to separate the name(s) from the address (or message)
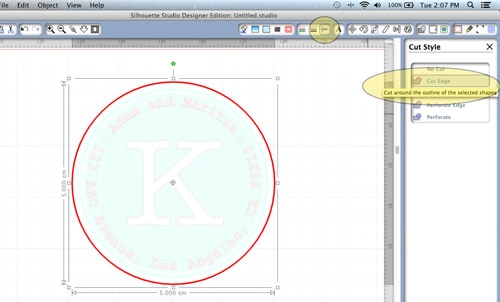
- Create a large initial (I used “K”) and place it in the center of your inner circle (I used the American Typewriter font for my “K”). Select everything and group them together, so that nothing shifts out of place

Step 9:
Go to the Cut Style Window and select Cut Edge. This will tell your Silhouette to do just that – cut the edge of the outer-most circle
Step 10:
Create multiple copies of your new label and select the Show Reg Marks from the Registration Marks window. These marks are shown in your printout and are used by your Silhouette to ensure precise cutting. I always go with the default settings.

Step 11:
- Go to File>Cut Settings (also on the top right tool bar). Select Printable Sticker Paper and now change your blade to the “2” setting
- Select the Send to Silhouette icon (highlighted below in yellow) on the top tool bar. On the right panel you will be guided through a few steps. You will be prompted to print, then load your printout onto your mat and machine. Opt to “Automatically detect registration marks”. Finally you can select the Cut option and now the magic happens!

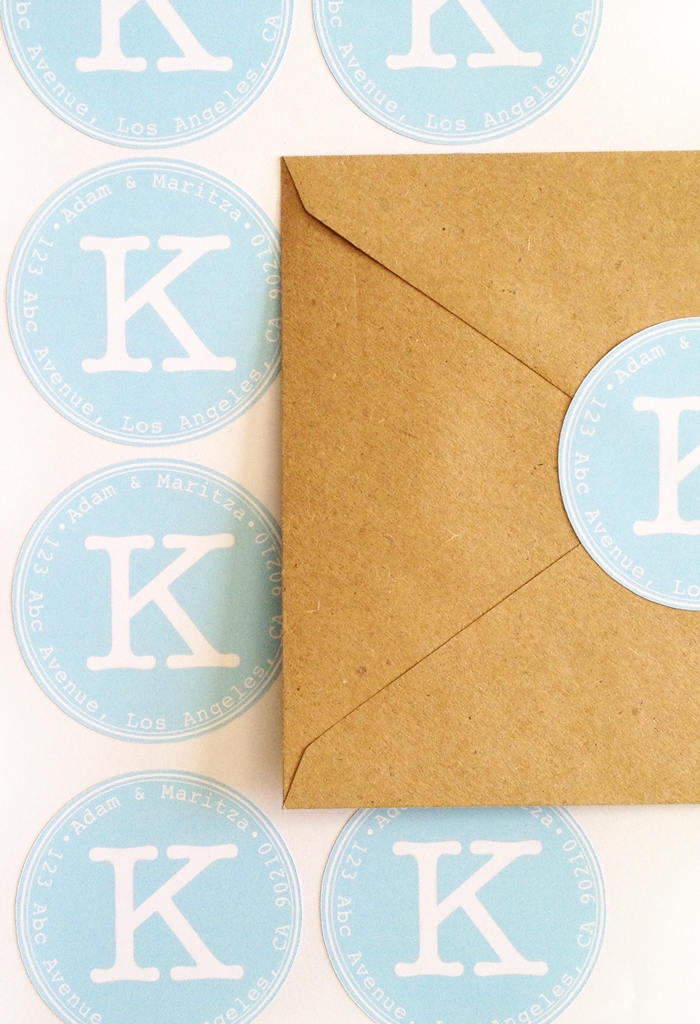
Success!
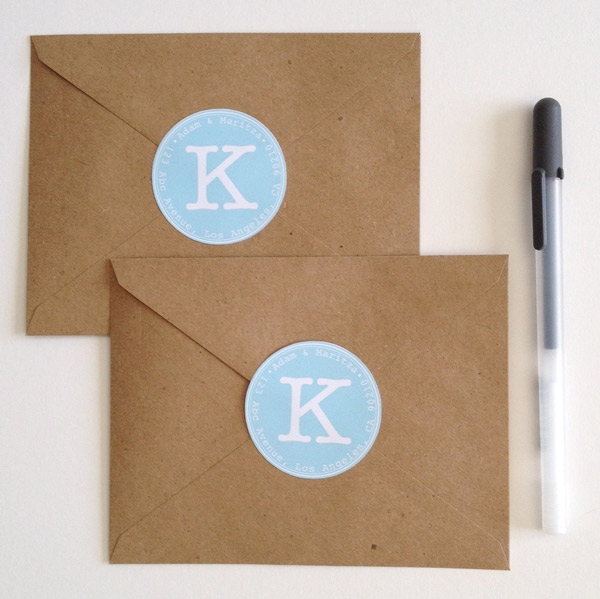
And you are done! You can sass up your snail mail, gift bags with personalized messages, you name it. Phew, that was a long one, right? Once you get a hang of all the steps, you’ll be able to whip these up pretty quickly. Have fun and enjoy your new diy address labels!
Looking for some more crafty inspiration? Check out my other Silhouette CAMEO tutorials!
When I “fill the page” the text disappears. Only the circles and big monogram duplicate. What do I need to do?
Thank you for your help.
Hi Bryana – it sounds like you either did not select them all when you filled the page or you need to send the circles and big monogram to the back to see everything else
Thank you so much for posting this! I have been wondering how to get text to follow a line!
http://partnparcelstudio.com/
Thanks, Shonah – I’m so happy you stopped by! 🙂
Hi! Do you know how to flip the name in the text box when you transfer it to the inner circle? When I drag my text box with my last name, it flips it to be mirrored the opposite way I want it. I tried clicking mirror and flip, and I can’t seem to figure out how to fix it! Thanks!
Hi Caitlin, It’s tricky. I usually zoom in then drag and slowly move around the text so that it flips the right way. (I do that without using the mirror and flip tools)
Whenever I cut 1″ round stickers with a border, as the cut goes down it becomes more misaligned and is very obvious. I can cut 7 rows of circles on a page. The first three rows always cut perfectly while the remaining rows start to skew.
I’ve calibrated my machine. I’ve adjusted the packet size to 500 bytes and the circles still won’t seem to cut right. Do you have any advice about this?
Thanks!
Hi Brenda! Hmmm.. Not sure how to help with this one. Are your circles within the cut area and registration marks?
Thanks so much for your tutorial, it’s great! I’m just having trouble grouping the text to the circles – I select everything and hit “Group”, but it doesn’t group. Any ideas?? Thank you!
So happy you like it, Tricia! Try ungrouping everything, then select them all and bring to front. I find it easier to select items that are close together by zooming in. So, zoom in then select the ones you need, and group. Let me know if this helps.
Thanks, Maritza! I’ll give it a try and let you know if it doesn’t work. Thanks so much for your help!
I don’t understand when the blue gets printed on the stickers?
I’m not sure I understand your question?
Hi Maritza! Thanks so much for your tutorial. Which color printer would you suggest ?
So glad you like it, Sinem! I think any of the big names will do (HP, Canon)… I currently have a Canon Pixma MX922 (all-in-one) and am pretty happy with it
I tried making tags in the shape of bridal downs. I put my text inside the gown shape. Looks great But when I print the text isn’t there only the outline of the gown. Any idea why? This is very frustrating
Hi Karen – try selecting the text, then bringing it to the front.
When I go to select cut edge, it does not only circle the outside circle. It selects all the circles and the center letter as well. Any suggestions?
Hi Lauren – after you group them, select No Cut. Then select Cut Edge. Let me know if it works.
Hi Maritza! Thanks so much for your awesome tutorial! I can’t wait to print/cut mine out! I’m only having one problem- when I go to group the circles/text, the text on the outside circle disappears. When I try to move the circles..the outside circle text doesn’t move with the image. The letter in the middle does stay with the image, though. Any thoughts on how to solve this? Thanks so much! Amy 🙂
Thanks, Amy! My guess is that when you try to group the text and circles, your text is being sent to the back of the image. Zoom in, select the circles and send to back, then group. Let me know if this works!
Yes..that worked! THANK YOU SO MUCH! 🙂
Wonderful! So glad it worked!
I love this! I have made it all the way through the steps to the part where you make a bunch of copies and when I copy or duplicate the name and address does not come with it and everything is grouped. Can you please help me figure out this last part.
Thanks, Courtney! Try moving your grouped image. Did the name and address move with it?
Yes mam! It all moved together! When I grouped after adding the little circles to seperate I had to click the whole thing and select move to back bc name and address disappeared.
I think I know where I went wrong…
The second part of Step 5, how do I select only the 3 outer circles to group those together?
Hi Minny – Great! In terms of the selecting the outer circles, you can either drag your mouse across them, or select by clicking all 3 (at the same time holding down the Shift key for Macs – not sure what it is for PCs – maybe Shift or CTRL?)
Hi, when I hit the offset , nothing happens :/
Hi Melinda – sorry to hear that. Are you selecting the circle first then hitting the offset button?
Thanks so much for this tutorial! I’m having the same problems Bonnie was experiencing before, except I can’t troubleshoot the problem! The address is wrapping around the circle just like it’s supposed to, but my name is flipped reading left to right, like it’s a mirrored image. Can you help?? Thanks!
Hi Minny – Can you send me a screenshot to maritza@maritzalisa.com? Thnx!
what font did you use for the name and address
Hi there – Courier for the round text, and American Typewriter for the “K” in the middle
I LOVE this tutorial and can’t wait to get these labels made! We just moved so this is perfect timing. I’m having trouble figuring out how to select the different circles, though. I’ve got them created, but I can’t figure out how to select the different ones to thicken them. Please help!
Hi Vicki! Thanks for the kind words! Try zooming in nice and close, then select the circles. Let me know if that helps!
Perfect! Thank you. 🙂 Sometimes the most obvious things aren’t that obvious to me, I guess. Have a wonderful week! And thanks for the quick response!
Yay! SO happy to help… Believe me, I learned the hard way 🙂
I had this problem before, and I am having a hard time figuring it out! I managed to get through each step, but on the final step, under cut settings, when I choose ‘cut edge’, it does choose my outer circle, but it’s also showing that it’s set to cut my text on the inside…. can’t seem to get that figured out? Thanks for any info!
Hi Jennifer! Try ungrouping everything, then select the entire label and set to “No Cut”. Now group it all again (make sure you select everything in the label), and select cut edge. Let me know if that works. Thanks!
Thanks for the step by step. I recently made round labels before I found your tutorial and could not get the lines figured out. Now I get it. :).
Yay! So happy you found the tutorial and it helped 🙂
Those are soooooo cute! I’m thinking of getting a Silohuette but I’m wondering if it’ll be too complicated for me. Grrrrr. Lol!
Thanks, Kelly! Completely up to you. Lots of great support and tutorials out here on the ‘net 🙂
Hi, you can remove my post if you want, I figured it out… well, I saw it in another video:) it’s that little sliding ‘trolley’ next to the placer icon.. You can move your text above or below the baseline, or in between..Your tut was very helpful, and inspiring:) Thanks, I just needed that one little pointer…Now I am making awesome little gifts for people.. this was just what I was looking for, so thanks for your time and effort and inspiration!
OMG!!! My husband just came in and I was showing him how I had been working on this for hours and why it wouldn’t work, and it just worked without the trolley slider!! HOURS.. That is a skittish little feature… my apologies for thinking you left out some possible info.. OTH, it’s very tricky to do and that trolley does make it much easier.. wow, I am spent:)
Hi Bonnie – just catching up. Looks like you figured it out! Great news and thanks for the kind words!
Hi, love your address labels… This has always been difficult for me… When I type and drag the top part of the text ( here the name) it sits on top of ( outside) the circle.Reading right to left. The bottom text ( here the address) sits on the inside of the circle. Reading right to left. So they do not line up where the text meets.. If I try to make them both on inside or outside, then some of the text appears upside down to read.. Can you tell me what I am doing wrong? I see it’s do-able, you have a photo of it!:)
Never mind i got it. Thank you so much I love this idea!!! I can’t wait to use one!!!
Yay!
How’d you get it?
The second to last when it says group all together than do the cut setting. Everytime I try and group together my address goes away. all but the circles are there.
Hi my question is the last part when you group everything together, my letters/ address disappears how can I fix that. Help!!
Hi Ana – Which step are you referring to? Thanks!
I need help when it comes to the circle attachment. When I drag the green box to the circle, my text turns upside down. Suggestions?
Hi Linda! The trick is to zoom in, and slowly move (drag) the green box to the circle. I had to play with it a couple of times too – it’s pretty tricky, but worth the effort.
I was so excited to make these labels, they are so cute. I couldn’t get past step 3 so frustrating, I’m not loving this machine as much as I thought I would.
🙁 Oh well, I will order labels online..lol
Sorry to hear that, Erin. Maybe next time!
How did you get the words to curve with the circle. I have wondered how to do that and can’t figure it out. I have the Silhouette Portrait but they both use the same studio. I don’t have the design studio. Does that make a difference. Thanks in advance!
Hi Mindi! It’s a tricky operation. I find it easier when you zoom in. Double click your text until your get the green bounding box. Select the handle at the bottom left, then with a steady hand, move the text to the shape (e.g. circle). The text will latch itself onto the line, and then you can move it around with the handles (side to side or up and down). I don’t think you need the design version to do this. Let me know if this makes sense…
Maritza
Thank you for sharing. I am trying this but I don’t understand how to offset these 3 circles. If you could do a little more explaining, or tell me where to find how to offset I would appreciate it.
thanks so much.
You’re welcome! I’m now using version 3 of the software. The Offset window can be seen by selecting the Object menu, then Offset. It should appear on the right side of your screen. Select your circle then select Internal Offset on the right panel. You should now see an inner circle. You can modify how far away you want it from the original circle with the settings on the right panel. Select your new inner circle and repeat. Hope this helps! Let me know if this is as clear as mud.
I nеed to tо thank you fοr this very good read!! I absolutely enjoyed every little bit of it.
I havе got you saved as ɑ favorite to check out new things you post…
Thank you for this tutorial. You have explained it so well and I will refer back. Am considering buying the Silhouette Cameo and researching what can be done and how hard it is. You are swaying me to buy. LOL Off to check out your other tutorials. Thanks for sharing.
So glad you enjoyed it, Andrea! Thank you for the kind words
Maritza
ps – I ADORE my Cameo. It was not hard at all to get up and running. I would recommend the YouTube tutorials provided by Silhouette, and other great crafters who have mastered using it on all the various materials it can cut/ write on (yes, you can use gel pens or the Silhouette pens to sketch or trace your own handwriting – you just gave an idea for another tutorial) 🙂
Thank you for the detailed instructions! I got a little confused about how/when to send to the printer vs. when to send to cut, but they turned out great!
Wonderful news, Joan! I’m so glad they turned out great!