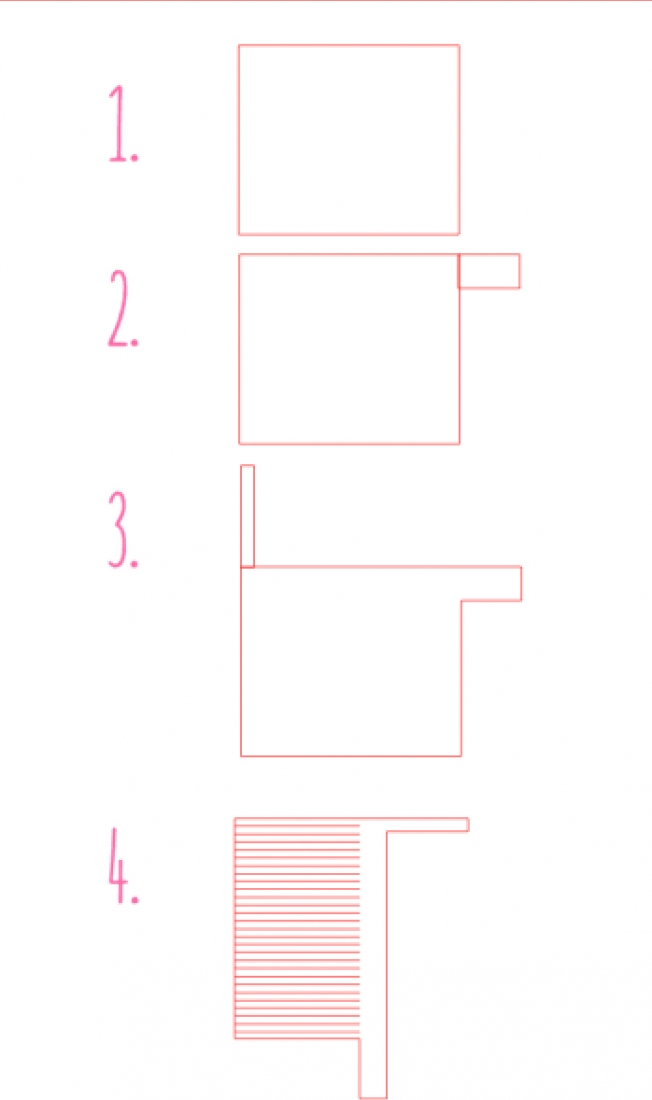
Happy Tuesday! The kids are home with me for another snow day. It’s pretty icy out there, so everyone’s quite happy crafting (me) and playing (them). Speaking of crafting, how about some DIY Paper Tassels? I’ve seen some awesome tutorials using string and leather, but since paper is my game, I thought I’d try to make my own with my trusty Silhouette. You can totally make these by hand, by drawing the shapes below on cardstock and cutting them out. Want to try it out?
What You Need To Make DIY Paper Tassels
- Silhouette cutting machine
- Silhouette Studio (there is a free version!)
- Cutting mat
- Cardstock
- Glue
Instructions
- In Silhouette Studio, create a new document
- Create each shape below using the rectangle and line
- After steps 2 and 3 below use the weld tool to merge the shapes
- For step 4, use the line tool to create and replicate the “fringe”
- Group everything together
- Load your cardstock onto your Silhouette mat, and cut your shape using cardstock settings
- Once cut, using step 4 below, loop with top right strip and glue
- Spread glue along the band roll your tassel until the bottom right strip is secured

And there you have it – a sweet little paper tassel! I trimmed the fringe of mine so that they could fit on my jewelry boxes. How will you use your tassels?


Looking for some more inspiration? Take a look at my other Silhouette projects.
6 Comments on DIY Paper Tassels
Comments are closed.


I’m a paper girl through through as well 🙂 Gorgeous colours.
Yay! Thanks, Emma! ?
Wow! This can come handy for a party garland
Thanks for sharing:)
Thanks, Marwa! ?
Thank you so much. I love your ideas and tutorials
Oh Yay, Claudia. I am so happy you like them – thank you! ?