
Not sure if you noticed, but I’m all about the positive messages these days. So many people are working extremely hard to keep us safe and healthy during these unprecedented times that will most likely be in our history books. Want a way to say thank you to them? Try making this DIY Thank You Iron On Transfer. Iron it on to a T-shirt, tank top or fabric gift bag. Your finished product will be perfect for sending a positive message to the people who we are so grateful to for taking care of us. I will also show you how you can update a serif font to add a cute flourish to some of the letters in your special message. Read on for the full tutorial!
*This post contains affiliate links for products that I use and love!
What Are Iron On Transfers?
Iron-on transfers are images or text that can be transferred onto a fabric medium with heat. They are commonly used to print onto T-shirts, tanks and canvas totes. Iron on transfers are first designed or given as part of a kit, then printed onto special sheets that can then be ironed on to your fabric for a custom feel.
Typically there are 2 types of Iron On Transfer Sheets that you can purchase in most craft stores and Amazon.com:
- Transfer sheets for light colored fabric
- Transfer sheets for dark colored fabric
For today’s tutorial I will be using transfer sheets for light colored fabric on a white tank top.
DIY Thank You Iron On Transfer: Materials
- Silhouette Studio (there is a free version!) or you can use another free tool like Canva
- Favorite font for your Thank You text (I used Abril Fatface with my own updates)
- Printer
- Scissors
- Printer paper for the sample
- Light Fabric Transfers for Inkjet Printers
- White tank top or T-shirt or fabric gift bag
- Scrap fabric or pillowcase
- Iron
- Waist high smooth surface (it is recommended that you do not use an ironing board) that has enough support for you to apply pressure as you iron on your text
DIY Thank You Iron On Transfer: Instructions
Step 1: Type Your Text
- Open Silhouette Studio or whatever graphic software you use
- Type your Thank You text using your favorite font
- Fill the font color to black
- Center and resize your text in the printable area. If you are using a serif font like Abril Fatface and want to add a little flourish to some of your letters, head to the optional step below
- Flip or mirror your text
Optional: How To Add A Flourish To Your Serif Letters In Silhouette Studio software
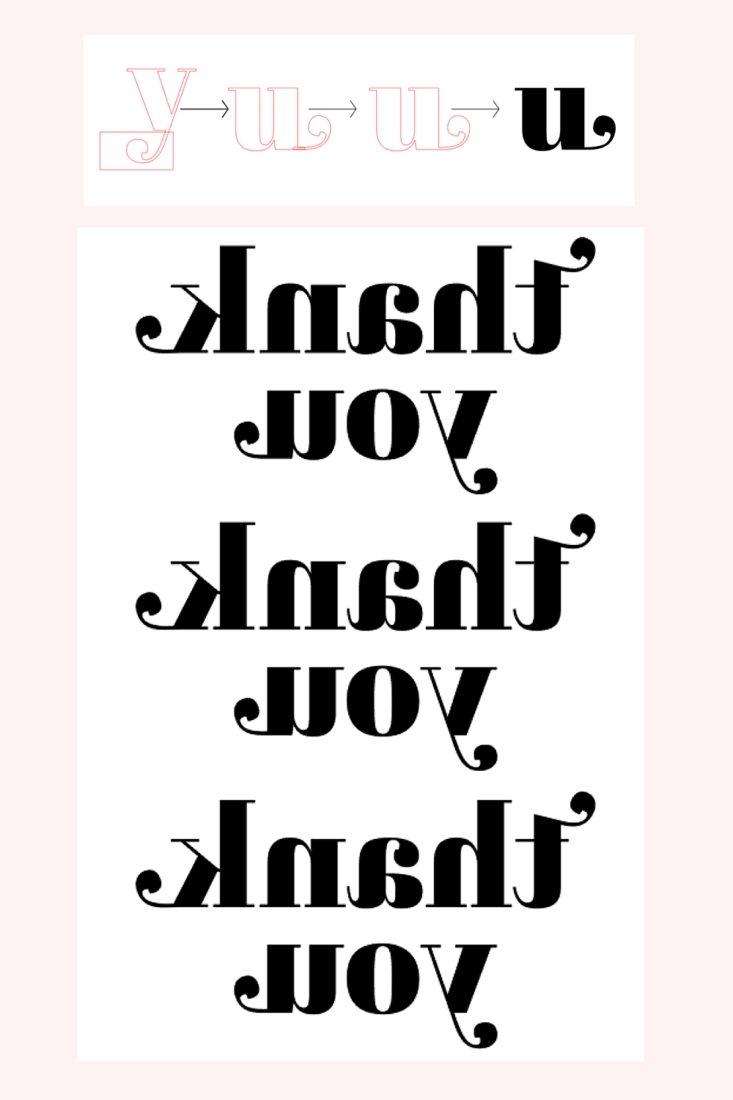
- I loved the way the lowercase “Y” looked so I made a copy of it and cropped the tail using the rectangle tool so that I can use it on the outer letters of my text
- I then used copies of the tail and welded them onto the letters T, K and U of my lowercase Thank You text. How did I do that? After typing the text, select all the letters and Ungroup them. Once you ungroup them, each letter is it’s own shape and can be welded or merged with other shapes! See the image below for how I did it.
Step 2: Send your Thank You text to print on Iron On Transfer Paper
- Print a sample of your text on regular printer paper first to make sure that the size and color meet your expectations
- If everything looks good, load your Light Fabric Iron On Transfer sheet into your inkjet printer
- Send your image to print using the best quality settings
Step 3: Trim your Thank You Iron On Transfer
Cut out your text staying very close to edges. Keep the edges rounded to avoid any curling or lifting from the fabric.
Step 4: Prepare Your Surface and Iron
Your surface should be waist high or lower so that you can apply pressure when ironing. Before turning your iron on, make sure it is empty of all water and set for No Steam.
- Put a piece of scrap cloth on the surface (a pillowcase is recommended)
- Set your iron to the highest cotton setting and preheat for 5 minutes
- Iron your scrap piece of cloth or pillowcase to remove the wrinkles
- Then lay your tank top or T-shirt on the scrap material or pillowcase
- Iron your tank top or T-shirt to remove any moisture
Step 5: Iron your Thank You Iron On Transfer
- Place the transfer paper with your printed text face down onto your T-shirt or tank top
- Iron on with pressure by making slow passes across the entire transfer – from left to right and top to bottom
Step 6: Cool Down
- After ironing, remove your T-shirt or tank top from the heated surface
- Allow your T-shirt or tank top to cool for about 2 minutes
Step 7: Peel The Transfer Off Of The Material
Once cooled, begin slowly peeling the paper backing from a rounded corner of the transfer off of your T-shirt or tank top. Your text should appear on your material
Step 8: Wash your T-shirt or tank top before using
To avoid ink bleeding or ink smearing, wash your T-shirt or tank top before using it or giving as a gift. The packaging for the image transfer sheets will have washing and care instructions that you can follow and/ or print out for you or if you are giving as a gift.
I love how my tank top turned out! Let me know how your pretty iron on transfer turned out in the comments below!

Looking for some more crafty inspiration? Take a look at these tutorials on How To Make Your Own Stationery!