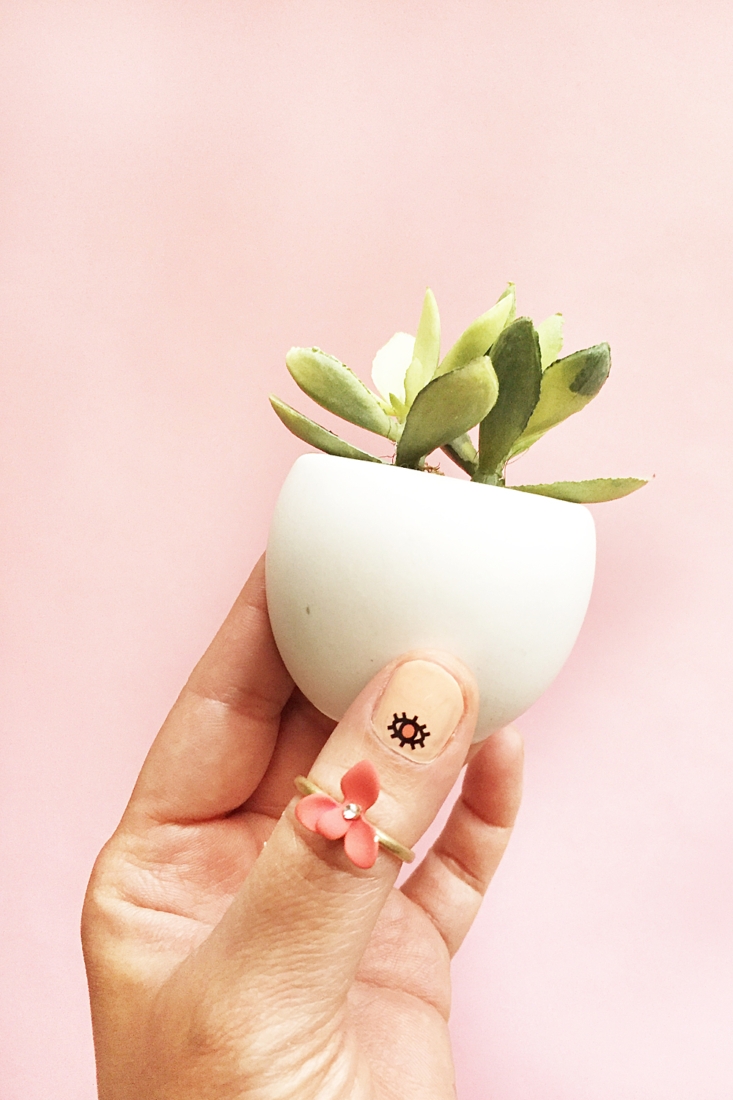
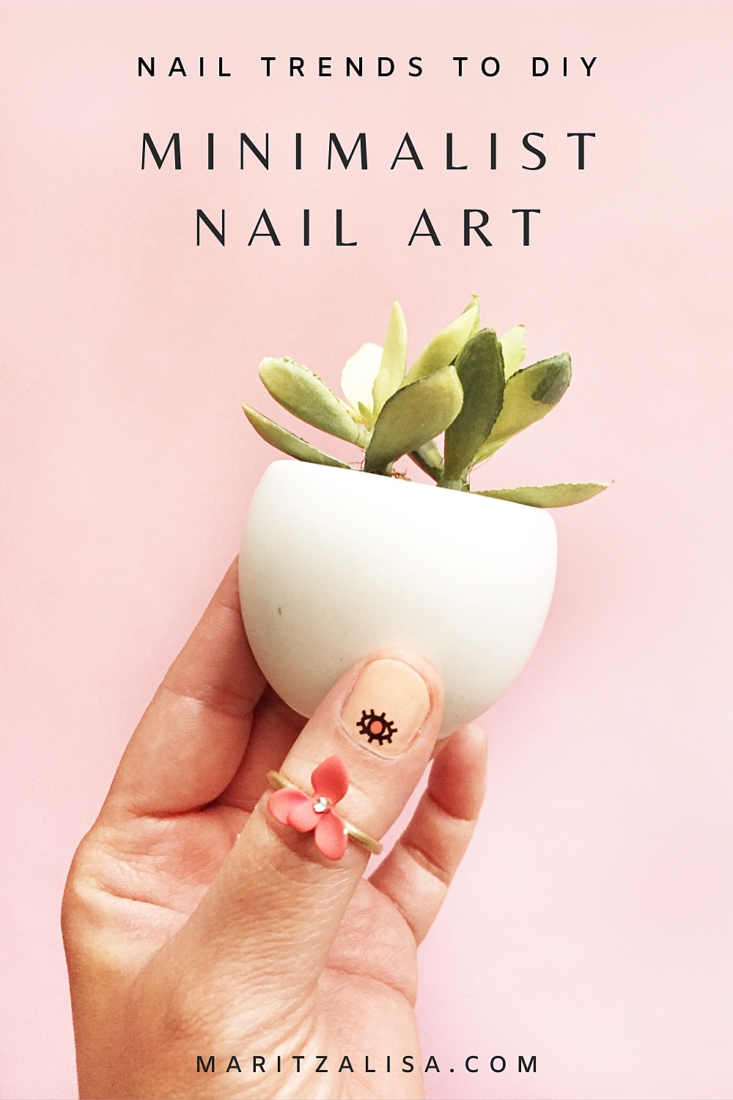
One of my go-to sources for checking what’s on trend is Google. Not gonna lie. So, when I searched for “Nail Trends”, I read articles that came from Fashion Week, well known magazines and influencers. One trend that appealed to me and hopefully you will like too, is nail art with minimalist accents. An example of this would be a small graphic or abstract element on a nude colored nail. So, this is what we will do today – read on for the full tutorial!
I also saw some modern takes on the French Manicure that I loved and may be inspiration for another post!
For today’s post, I wanted to show you how to do your own minimalist nail art. You can make it as simple as you want. We’ll be using temporary tattoos on nude nails.
*This post contains affiliate links for products that I use and love!
About Temporary Tattoo Paper:
Printable Temporary Tattoo Paper is one of my main craft supplies. If you’re new to this little blog or new to this medium, I thought I’d share a little introduction to this versatile product. Hopefully it will answer any questions you may have before using it for your trendy minimalist nail art.
You can make all sorts of temporary tattoos with Silhouette America’s Temporary Tattoo Paper. The temporary tattoos you make are perfect as favors for kids’ and adults’ parties and even sporting events. What’s also fantastic about these temporary tattoos is that you can apply them to smooth surfaces like your nails! The tattoos can be applied easily with water, and generally last a few days if you apply a clear coat on them. My last nail art that I did with temporary tattoos lasted almost a week!
There are a number of temporary tattoo paper options:
- Clear
- Gold
- Silver
- White
For our nail trends project today, we will use the clear sheets. Why? Because you can print images on the sheets and they come out with a clear background that is perfect for your nails!
Materials: DIY Nail Trends With Temporary Tattoos
- Silhouette Studio (there is a free version available for download!)
- A small image for your nails. I used the little eyes from my DIY Eye Pencils and DIY Eye Bracelet posts
- Printer
- Temporary Tattoo Paper
- Scissors
- Scraper
- Wet cloth or sponge
- Nude nail polish
- Clear Top Coat
How To DIY Nail Trends With Temporary Tattoos
Apply Your Nail Polish
If you have not done so already, apply your nude colored nail polish to your nails, and let them dry. Save the top coat application for after the nail art temporary tattoo is applied
Source or design your own minimalist image for your nails
You can either make your own design from scratch or source an image. As mentioned before, I used my “eye” design from my DIY Eye Pencils and DIY Eye Bracelet posts. If you want to make something similar, here are the instructions.
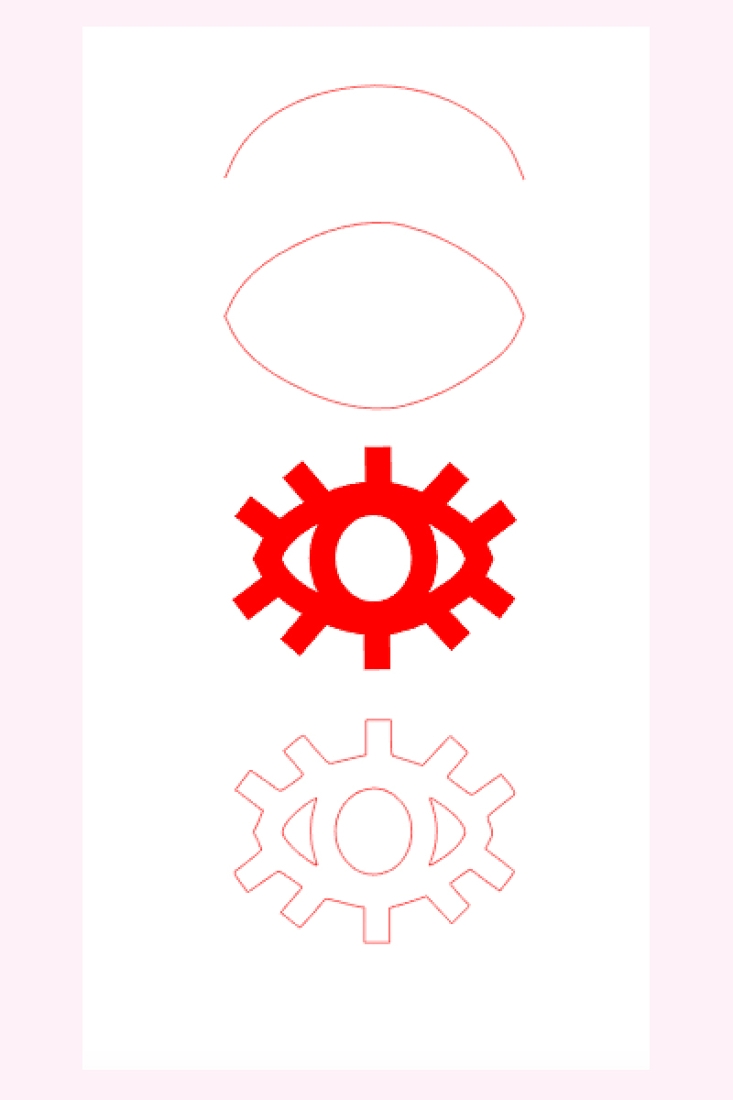
Open your minimalist image in the Silhouette Studio software
- Open your image in Silhouette Studio
- Mirror your image so that it is reversed. When printed on the tattoo paper and applied to your nails, it will appear the correct way
- Resize the image so that it will fit on your smallest nail
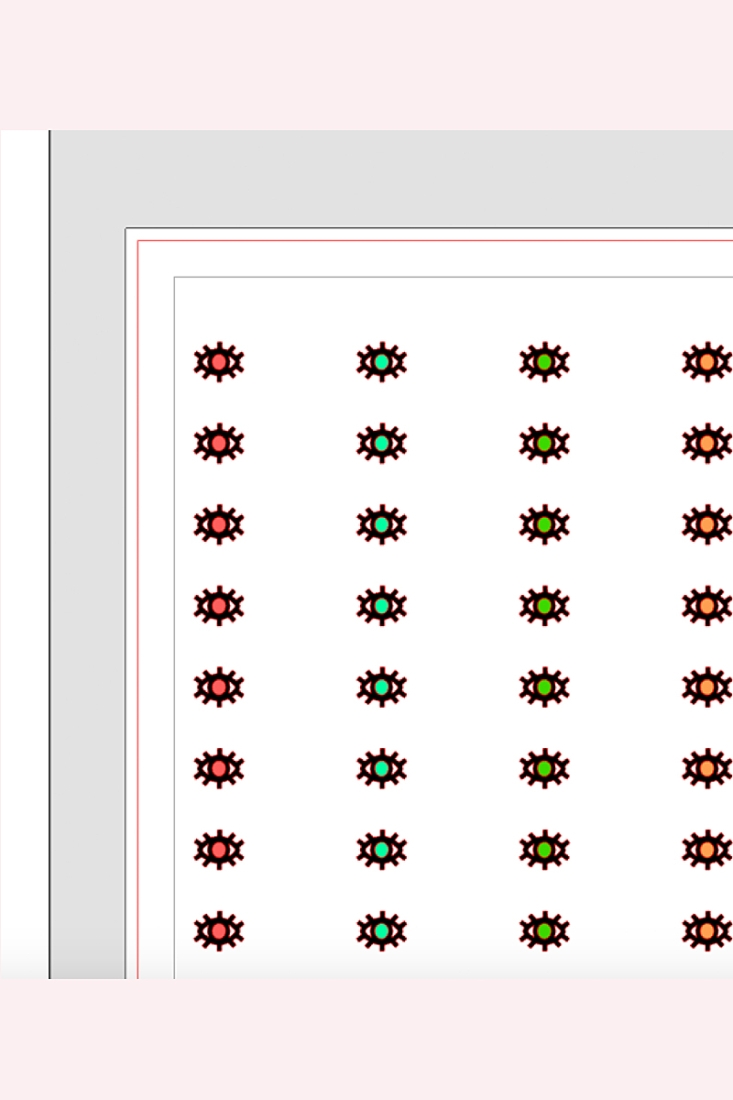
- Replicate and place your images in the printable area of the Silhouette Studio software
Send Your Nail Art to print on Temporary Tattoo Paper
- Load your temporary tattoo paper into your printer, making sure that the images will print on the glossy side. I recommend using the highest quality print settings or photo paper settings
- Send to print
- Let the ink dry
Prepare the Temporary Tattoos for your Nails
- Apply the clear adhesive sheet (with the green backing) to the top of the sheet you just printed with your nail art images
- Use the scraper to smooth out any bubbles and rub the adhesive sheet to the images
Apply Your Tattoos To Your Nails
- Use your scissors to cut out the nail art images, staying very close to each image’s edge
- For each tattoo, peel off the clear adhesive layer
- Apply each tattoo image down on your nail, and cover with a wet cloth or sponge for 10-15 seconds until the white paper backing slides off easily
- Apply the top coat to seal the tattoo
- Repeat for each nail
And that’s it! Nail trends can be a fun and creative activity to DIY. All you need is your creative mind and temporary tattoos! Tell me in the comments below how your minimalist nail art turned out!
Looking for some more crafty inspiration? Take a look at some of my other DIY Temporary Tattoo Projects!