
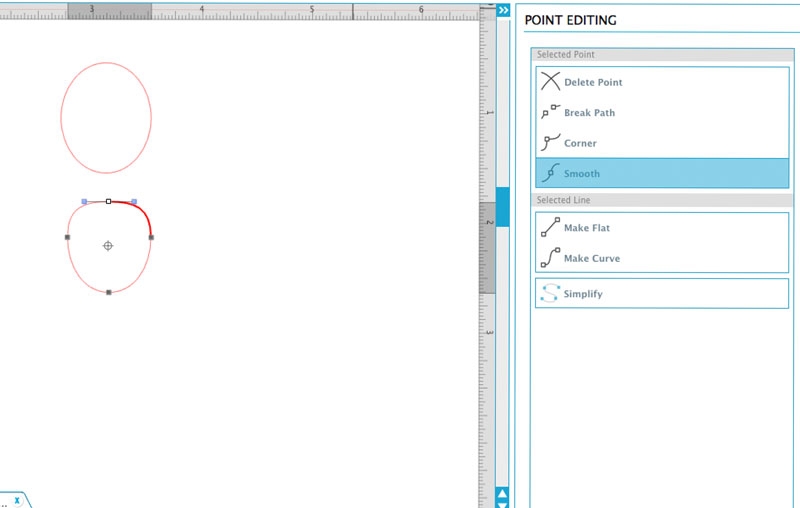
Happy Friday! I wanted to share how I created these paper petals for DIY Paper Flowers using the Ellipse and Point Editing tools in Silhouette Studio. These little petals are perfect for table settings, gift embellishments, banners, flowers, you name it! The Ellipse tool allows you to draw anything round (circles, oblongs, etc). The Point Editing tool allows you to do just that – manipulate the points in a shape. Petals and paper flowers are everywhere, so I thought this would be a nice simple shape to play with.
DIY Paper Flowers – What You Need
Instructions
- Create a new document in Silhouette Studio
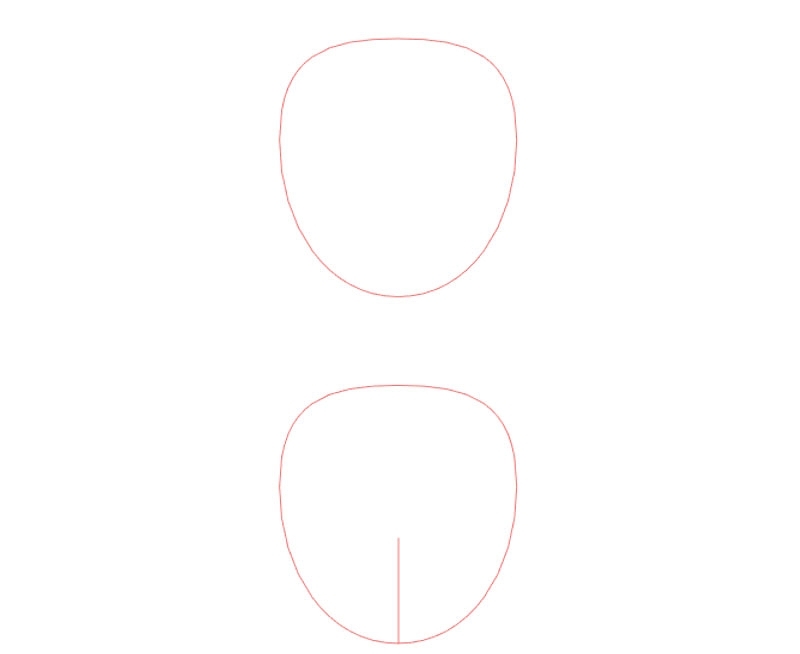
- Create an oval with the Ellipse tool
- Double click on the shape to get edit the points
- Move the top point downwards to create your petal
- Using the Line tool, draw a small line to the bottom of the petal
- Load your paper and send to cut using Copy Paper settings
- Once your shapes are cut, use the glue to overlap the two pieces from the line cut from the petal
To create flowers, layer 3-4 petals

Then add a little glue and glitter in the middle
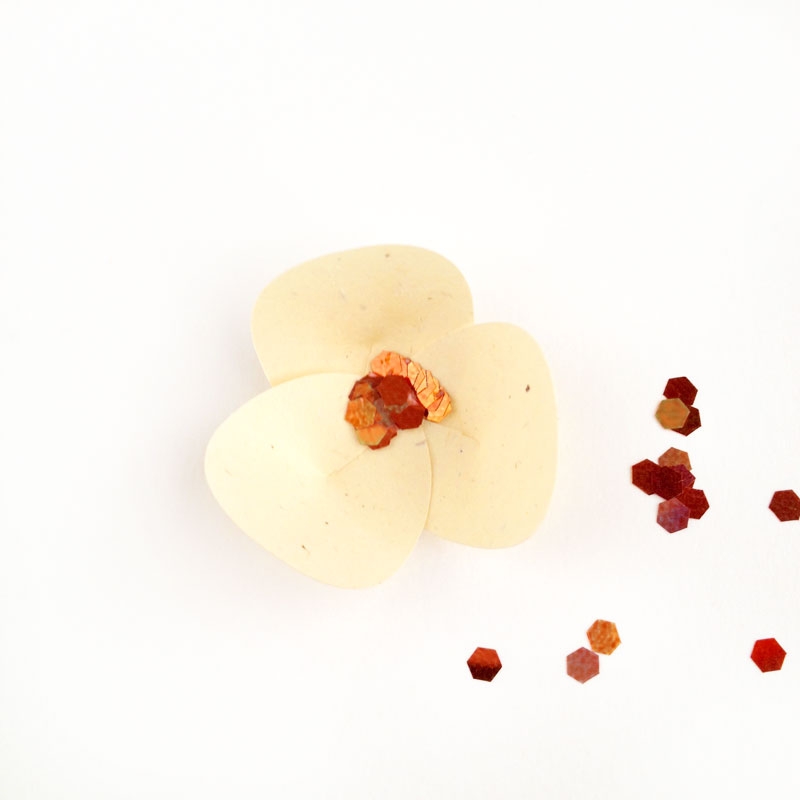
And you’re done! How will you shape and use your paper petals for your DIY Paper Flowers?


These are so pretty!!
Thanks, Ras!