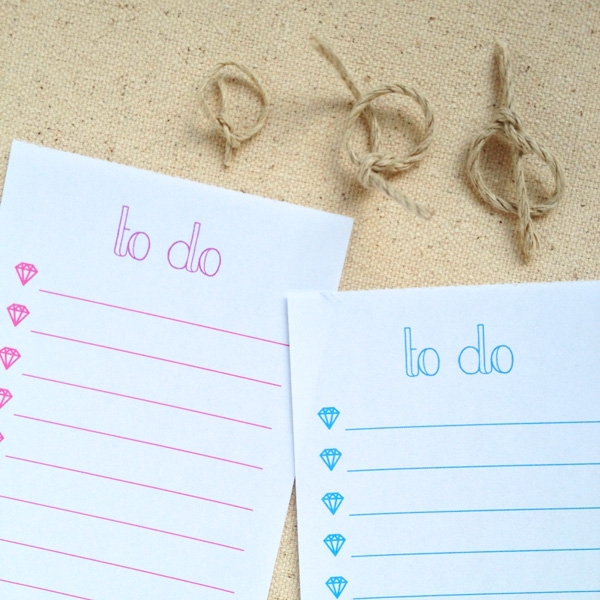
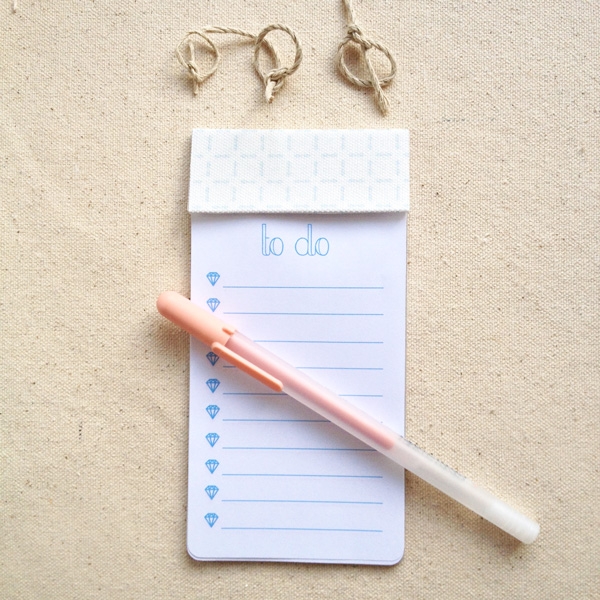
Soooooo, after my post earlier this week, are you inspired? I was, and I already have the CAMEO! That being said, I thought I’d tackle another notebook, but one with detachable pages, and a to do list! One of my favorite features of the Studio software is the grid. Simple and effective. When you view the grid, so many happy things can happen much easier. For this To Do List Notebook project, I used the grid to measure the lines and add these little gems as bullet points. Wanna try?
The What
- Silhouette cutting machine
- Silhouette Studio
- Cutting mat
- Glue
- Chipboard or Cardstock
- Print/Copy Paper
- Stapler
The How
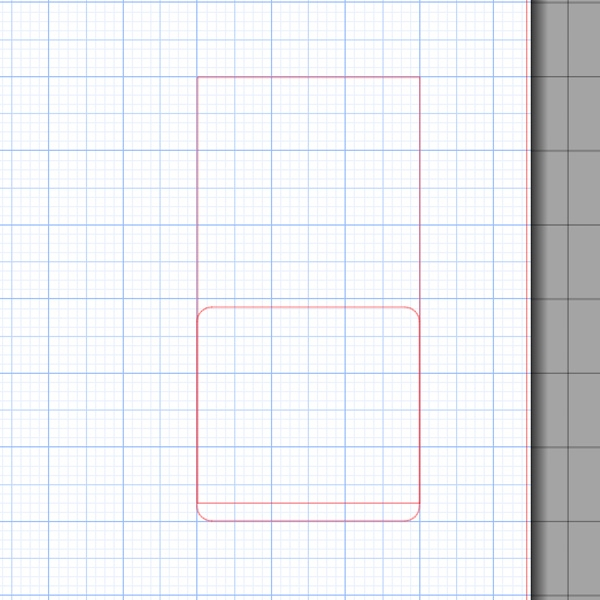
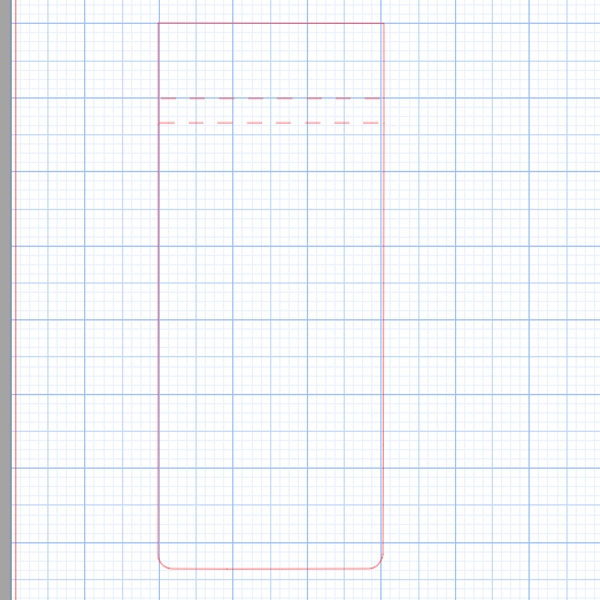
Step 1: Create a new document in Silhouette Studio and show the grid. I created the page shape by welding a rectangle and rounded rectangle
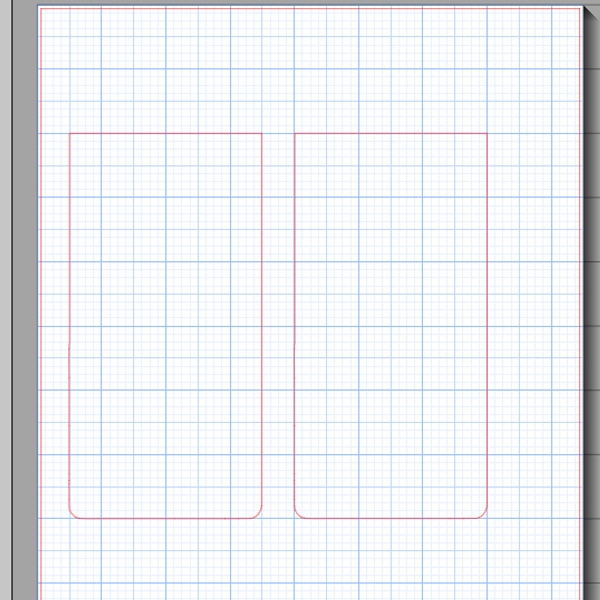
Step 2: Create a duplicate which will be used later to create the notepad cover
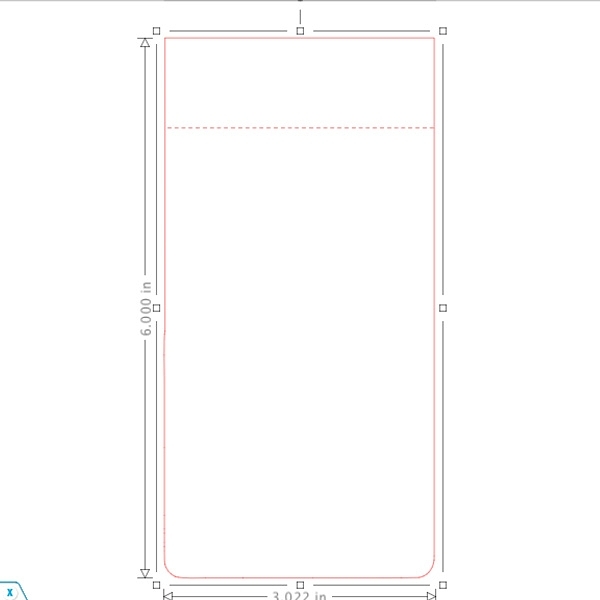
Step 3: Create a dashed line about 1″ from the top so that your pages can tear off easily
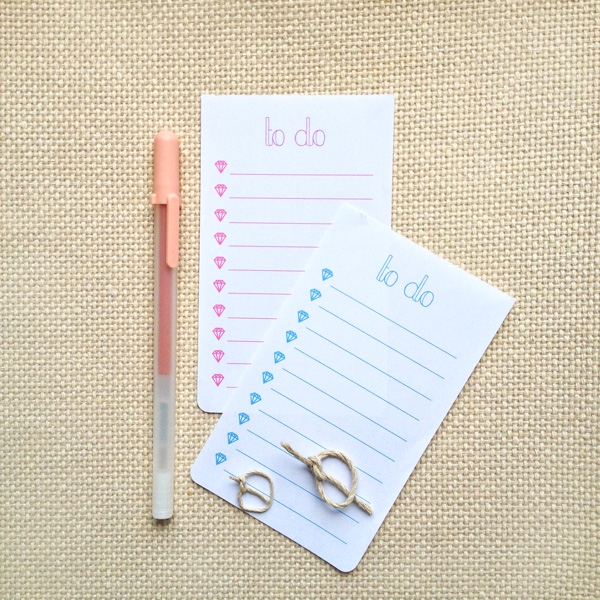
Step 4: Add your text, lines and bullet points using the grid. Make sure that your cut settings for these components are set to “No Cut”
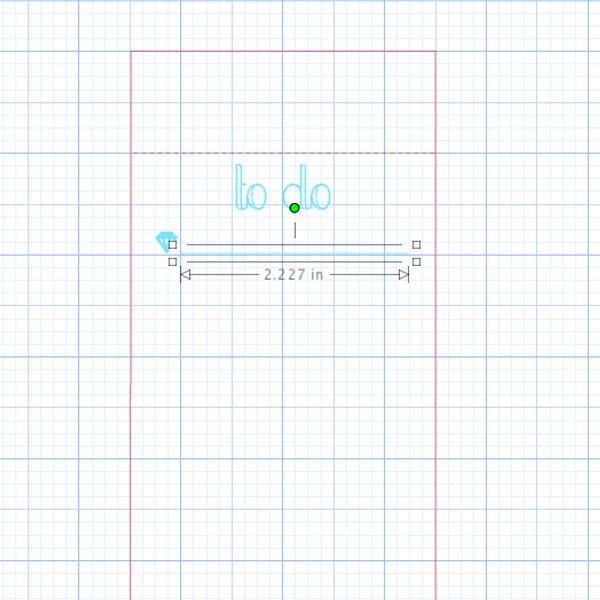
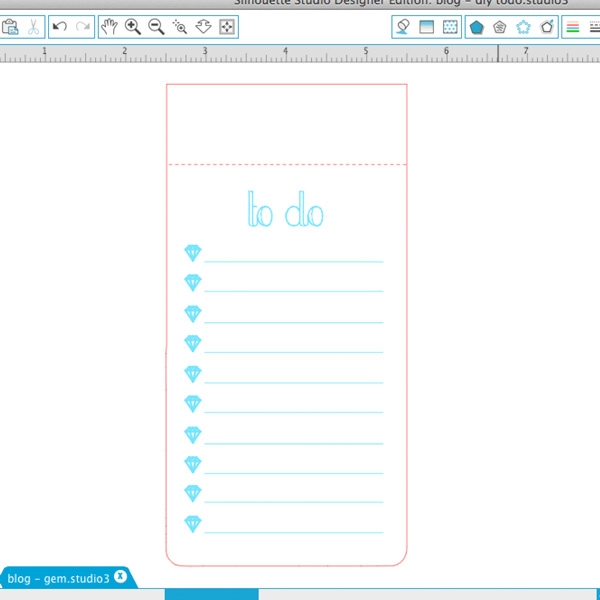
Step 5: The finished page should look like this. I used the print and cut feature for the pages on print or copy paper
Step 6: Create the cover using the duplicate from Step 2. Lengthen it a bit and add dashed lines for scoring/folding. Cut with chipboard or a sturdy cardstock (don’t forget to adjust your blade and cut settings). The tops of your pages will align with the bottom dashed line
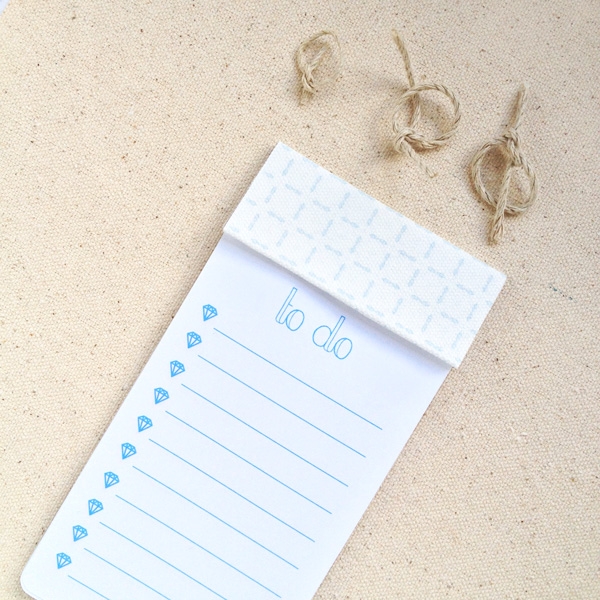
Step 7: Staple the “to do” pages together, fold the cover at the dashed lines (optional: use cotton canvas over the cover); and finally, glue the pages to the cover (bottom dashed line)

Now you can enjoy your new To Do notepad!

Hello there, thank you for the tutorial 🙂 Even I tried making ‘to-do list’ planner. Check it out on : http://goo.gl/kKpghg 🙂
Awesome – they look great!
I’ve made a To Do list Notebook with my Cameo too!
Here’s mine if you want to take a peek:) http://www.getsilvered.com/2013/09/making-a-list-free-file-friday/
I love the gemstone bullet points in yours – very cute touch 🙂 I just discovered your blog via Craftgawker. It’s lovely and so are all your projects.
Yay, Pam! Love your version – those dashed lines! Thank you so much for your kind words – have a great weekend!!